Precision Spindle Metrology PDF: 1st Ultimate Guide
Why Precision Spindle Metrology is Critical for Manufacturing Accuracy
Precision spindle metrology pdf resources are essential for understanding how to measure and analyze spindle performance at the nanometer level. These documents detail the methods and tools for achieving modern manufacturing accuracy.
Quick Answer for Precision Spindle Metrology:
- Definition: The science of measuring spindle error motions at nanometer precision
- Key Methods: Donaldson Reversal, three-point method, multiprobe techniques
- Standards: ISO 230-7 and ASME B89.3.4 for geometric accuracy testing
- Applications: Ultra-precision machining, aerospace components, optics manufacturing
- Tools: Capacitive sensors, precision artifacts, data acquisition systems
The demand for accuracy and productivity in manufacturing continues to grow. High-speed machine tools and multi-tasking equipment are at the heart of production, with spindles serving as their critical foundation.
As noted by Eric R. Marsh, spindle error motions can be measured at over 100,000 rpm with nanometer-level precision. Air bearing spindles can achieve error motions less than 25 nanometers, while traditional rolling-element spindles may have larger asynchronous errors.
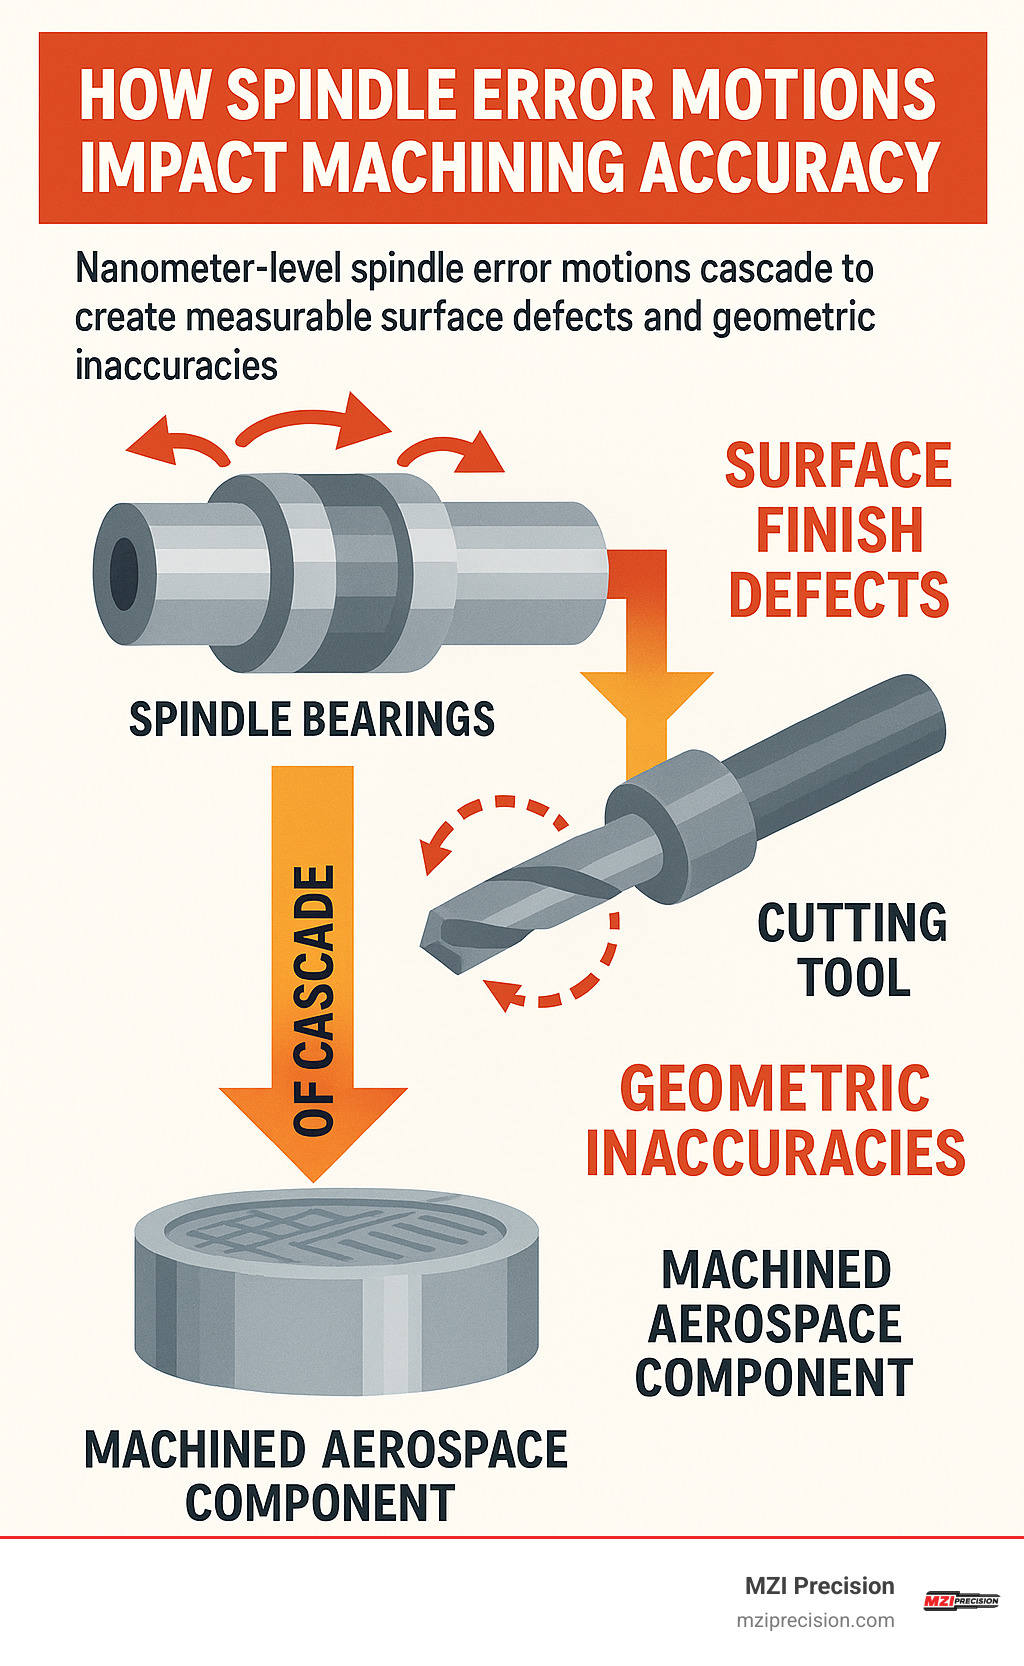
The challenge is that even tiny spindle errors create visible defects. A few nanometers of error can mean the difference between a perfect aerospace component and costly scrap.
This is where precision spindle metrology becomes essential. It’s the science of measuring these microscopic motions to understand, predict, and improve manufacturing outcomes.

What is Precision Spindle Metrology and Why Does It Matter?
Precision spindle metrology is the science of measuring the microscopic movements and imperfections in industrial manufacturing spindles. It’s a comprehensive health check-up that spots problems invisible to the naked eye, which can make or break a manufacturing process.
This matters because the spindle is the heart of any machine tool. If it isn’t performing perfectly, everything downstream suffers. Poor spindle performance translates directly into rougher surface finishes, shorter tool life, and parts that don’t meet specifications.
Modern manufacturing is incredibly demanding. Yesterday’s “good enough” spindle performance is inadequate today. As machine tools become more precise, spindle errors are a larger part of the total error, making metrology essential.
These measurements are at the nanometer level—billionths of a meter. For perspective, a human hair is about 80,000 nanometers wide; we’re looking for imperfections thousands of times smaller.
The foundation of this work is understanding the axis of rotation. Ideally, a spindle rotates around a perfect line, but in reality, factors like bearing clearances, thermal expansion, and dynamic forces cause this axis to wander.
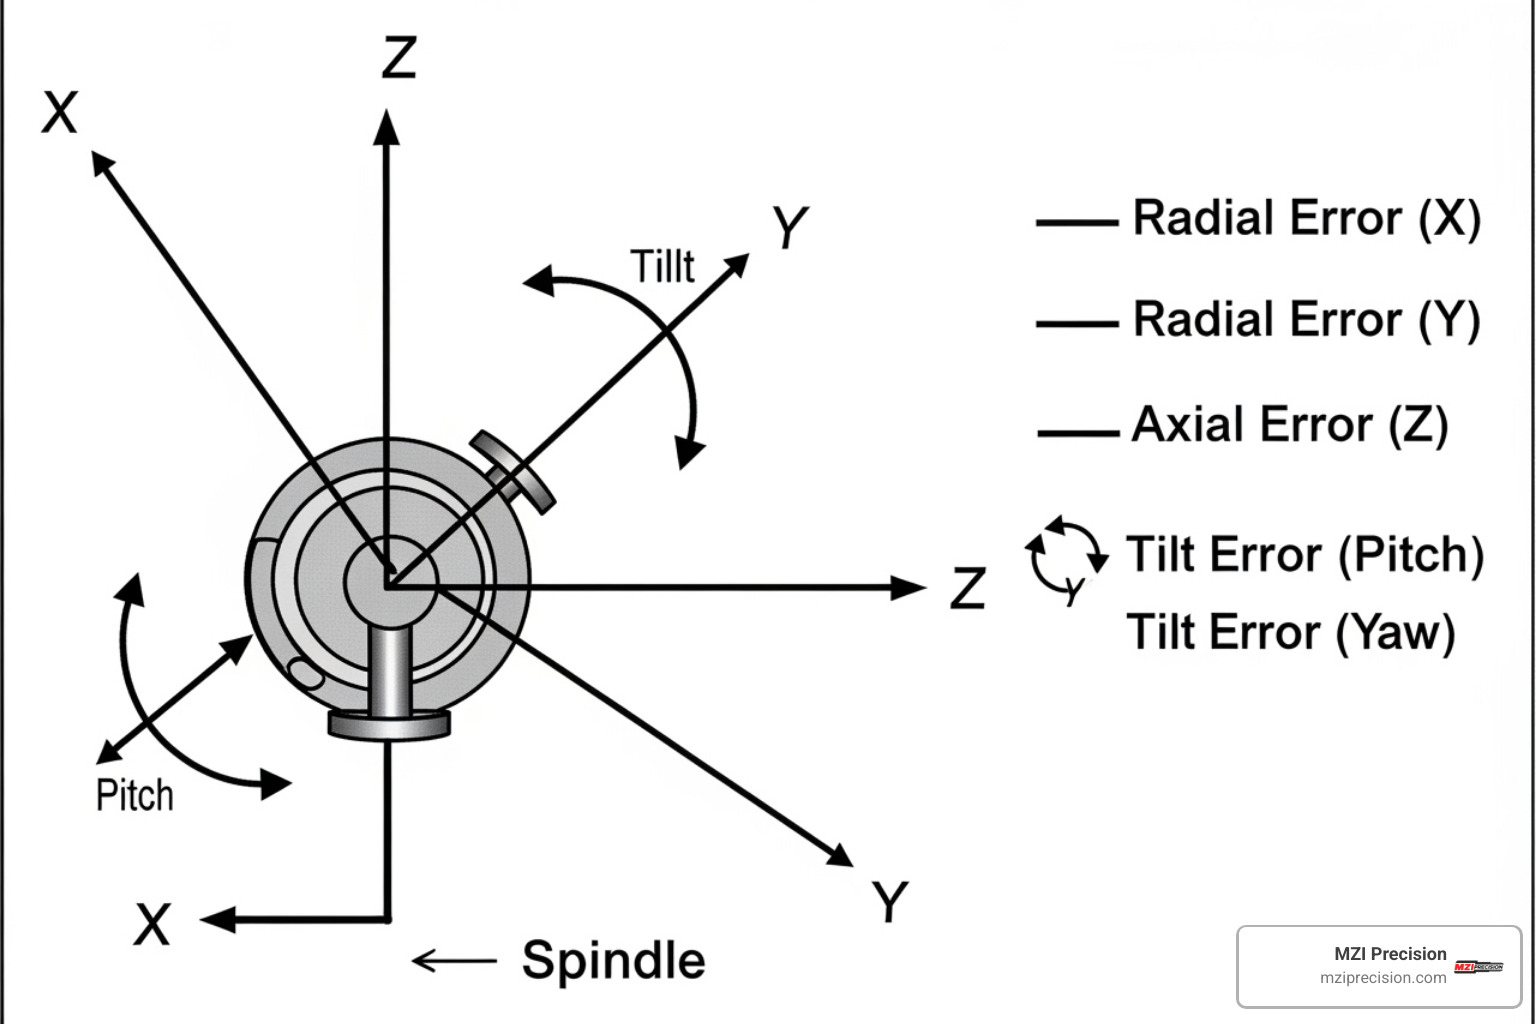
These wandering movements fall into three main categories of error motion:
Radial error motion happens when the spindle moves perpendicular to its rotation axis, causing parts to be oval instead of round. Axial error motion occurs parallel to the rotation axis, affecting part length and flatness. Tilt error motion is when the axis wobbles, creating tapered surfaces.

Synchronous vs. Asynchronous Error Motion
Understanding the difference between synchronous and asynchronous error motion is crucial for diagnosing spindle problems.
Synchronous error repeats at exact multiples of the spindle’s rotation speed. This predictable error primarily affects workpiece geometry—things like roundness, flatness, and overall part shape. While problematic for precision parts, it’s consistent.
Asynchronous error is random and non-repeating. It doesn’t follow the spindle’s rotation and is often caused by bearing noise, vibration, or turbulent airflow. This error is the main cause of poor surface finish quality.
The type of bearings in your spindle makes a huge difference. Air bearing spindles are precision champions, often achieving error motions below 25 nanometers. Their smoothness generates minimal asynchronous error, making them ideal for ultra-precision work like optics manufacturing.
Rolling-element spindles are robust workhorses but typically show more asynchronous error from mechanical contact. A high-quality rolling-element spindle might have asynchronous errors of 1000 nanometers or more, which is adequate for most manufacturing applications.
This distinction helps explain why some spindles excel at creating perfectly round parts but struggle with mirror-like surface finishes. Understanding your spindle’s error motion signature is key to optimizing your manufacturing process.
The Anatomy of a Spindle Metrology System
A spindle metrology system is a high-tech kit for catching nanometer-level movements. At this scale, every component must work flawlessly.
The system’s heart is the high-precision artifact, such as a master ball or cylinder, mounted to the spindle. These reference pieces must be manufactured to near perfection, with a form error (typically <30 nanometers) significantly smaller than the spindle error being measured. Otherwise, special error separation techniques are required.
The “eyes” of the system are non-contact displacement sensors. Capacitive sensors are the gold standard, offering sub-nanometer resolution. They measure changes in electrical capacitance as the distance to the spinning artifact changes, detecting movements smaller than an atom. Their high bandwidth captures rapid motion, even at high speeds.
Fixturing and mounting are critical. Any instability, vibration, or flex in the setup will appear as false spindle errors in the data. Everything must be rock-solid stable.
Finally, our Data Acquisition (DAQ) hardware converts analog sensor signals into digital data for analysis. This includes specialized DAQ cards and software with proper anti-alias filtering to prevent high-frequency noise from corrupting measurements.
The Impact of Environmental Factors
Measuring at the nanometer level is challenging because the surrounding environment becomes a source of error.
Temperature is a major challenge. Spindles generate heat, causing thermal growth that skews measurements. Spindles can grow up to 16 micrometers in the Z-axis during warm-up, and cool-down can take 2-3 times longer. Even small ambient temperature changes (3-4°C) can cause significant tool length variations. The research paper “Measurement of Spindle Thermal Growth on a Machine Intended for Micro/Meso Scale Milling” dives deep into this challenge.
Vibration from floors, machinery, and even acoustic noise can be picked up by sensitive sensors and mistaken for spindle errors.
Electrical noise is another culprit. Electromagnetic interference from power lines or motors can introduce unwanted signals into sensor readings, compromising measurement integrity without proper shielding.
For air bearing spindles, air supply pressure fluctuations are critical. Small pressure changes can affect bearing stiffness, which in turn impacts the spindle’s error motions.
Achieving accurate nanometer-level measurements requires becoming an environmental control expert. Robust setups, climate-controlled rooms, and vibration isolation systems are often necessary to chase perfection at this scale.
Key Measurement Methods and Finding a Precision Spindle Metrology PDF
The primary challenge in spindle metrology is that the reference artifact used for measurement is not perfectly round. When the artifact’s imperfection is similar in scale to the spindle’s error, it complicates the measurement.
Error separation techniques are ingenious methods that distinguish the spindle’s actual error motion from the imperfections in the measurement artifact.
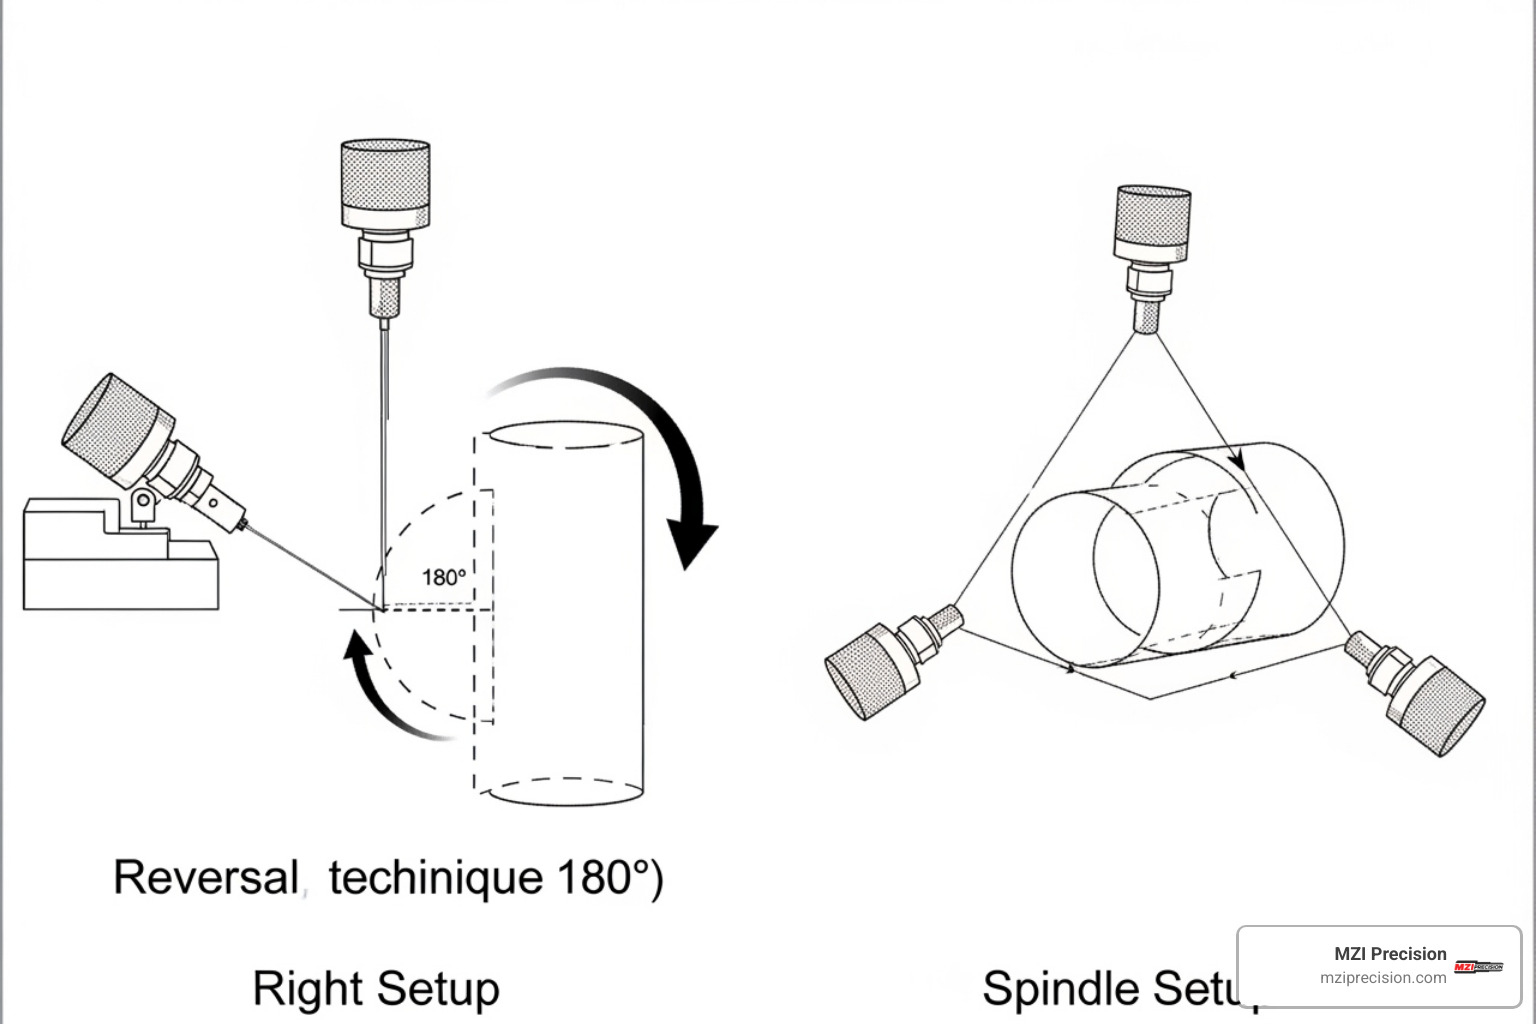
The Donaldson Reversal method is a respected technique that involves taking two sets of measurements: one before and one after reversing the artifact or sensor setup. Clever mathematics then separates the spindle error from the artifact error.
While powerful, the Donaldson method is challenging. Achieving a perfect reversal while maintaining stability is demanding in a manufacturing environment.
Multiprobe methods, like the three-point and four-point methods, use multiple sensors positioned around the artifact. Algorithms process the data to separate spindle error from artifact error without physical reversals, simplifying the process and reducing handling errors.
The Tlusty method provides a crucial way to synchronize the spindle’s angular position with data sampling, ensuring measurements are perfectly correlated with the spindle’s rotation.

Common Techniques for Measuring Spindle Error Motions
There is a key difference between static and dynamic testing. Static tests are easier and cheaper but are performed while the spindle is stationary or rotating very slowly.
However, static tests don’t capture how a spindle behaves under real operating conditions. At operational speeds (sometimes over 100,000 rpm), factors like heat, vibration, and centrifugal forces dramatically affect performance.
Dynamic testing measures error motions while the spindle runs at operational speed. Though more complex, it’s the only way to understand true performance.
Research like the study “In Situ Measurement of Spindle Radial Error for Ultra-Precision Machining Based on Three-Point Method” shows how sophisticated these measurements have become, achieving nanometer-scale precision in active machining environments.
A basic radial error motion test involves:
- Preparing clean surfaces and allowing thermal stabilization.
- Mounting a precision artifact to the spindle.
- Positioning non-contact sensors around the artifact.
- Connecting to a high-speed data acquisition system.
- Running the spindle at test speed.
- Collecting synchronized data.
- Processing the data to separate synchronous and asynchronous errors.
Historical Development and Accessing Key Research
The history of precision spindle measurement includes pioneers like Georg Schlesinger, Wayne Moore, and Richard Moore. Richard Moore is often credited with adding “an extra decimal place of accuracy” to manufacturing.
George Tlusty also made significant contributions, especially in correlating spindle position with measurement data. What began as simple runout checks has evolved into today’s sophisticated nanometer-level analysis.
For those researching this field, a search for a precision spindle metrology pdf often leads to foundational work like Eric R. Marsh’s book “Precision Spindle Metrology” (Second Edition, 2010). It is a go-to reference for the theory and application of the science, covering everything from basic fundamentals to advanced error separation techniques.
Decoding the Data: Analysis, Challenges, and Standards
After collecting raw data, the challenge is to turn numbers into actionable insights about the spindle’s internal behavior.
The data acquisition process requires synchronization with the spindle’s rotation, typically using a rotary encoder’s “once-per-revolution” signal. Analog anti-alias filtering is applied before digitization to prevent high-frequency noise from corrupting the data. Afterward, zero-phase-shift digital filters can further clean the signal without distorting phase relationships.
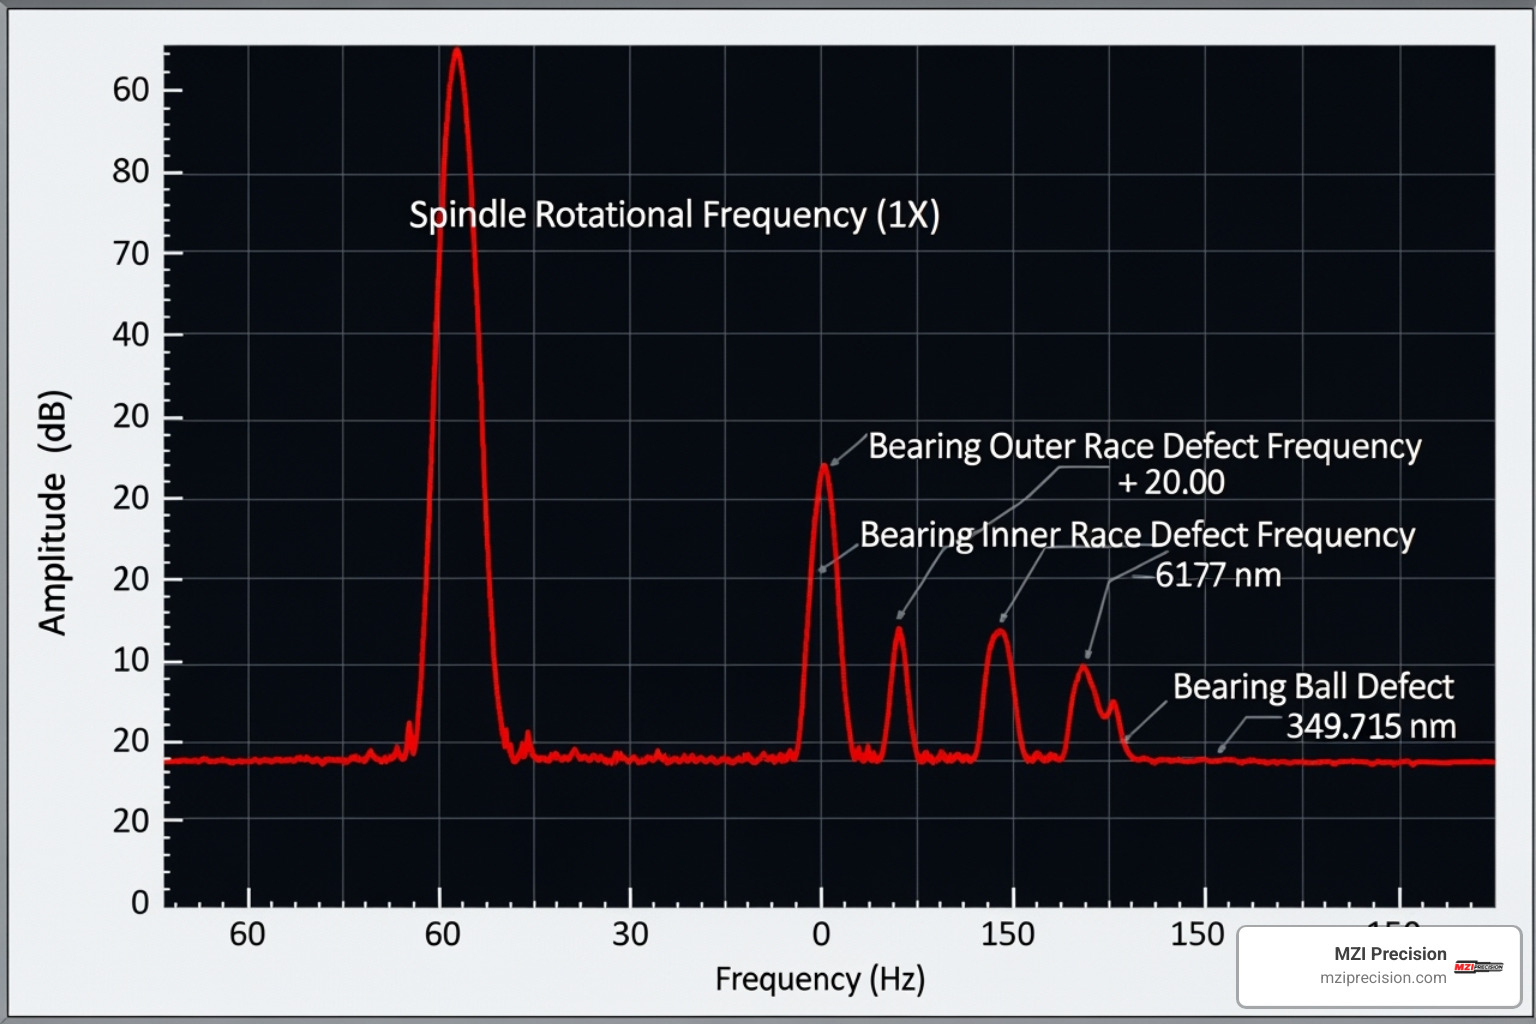
The Fast Fourier Transform (FFT) is a key analysis tool. It transforms time-domain displacement data into the frequency domain, breaking down complex motion into its individual frequency components.
With FFT analysis, we can identify defect frequencies that act as fingerprints for specific problems like bearing issues. We can also separate synchronous and asynchronous errors; synchronous errors appear at the rotational frequency and its harmonics, while asynchronous errors appear as broader spectrum noise.
Polar plots offer another powerful visualization, showing the spindle’s error motion as a trace around a center point. This makes it easy to spot error patterns and distinguish between synchronous and asynchronous components.

Achieving nanometer precision has challenges. Sensor noise is significant at this scale, and fixture instability can introduce vibrations that mask the true spindle motion.
Environmental factors like temperature changes, vibration, and electrical noise introduce unwanted signals. Meticulous setup, controlled environments, and advanced data processing are essential for reliable precision spindle metrology pdf documentation and analysis.
Applying Industry Standards like ISO 230-7
Industry standards provide a common language for testing and specifying spindle performance. The two key standards are ISO 230-7: Test code for machine tools – Part 7: Geometric accuracy of axes of rotation (2006) and ASME B89.3.4: Axes of Rotation, Methods for Specifying and Testing. They provide the foundation for reliable and consistent spindle analysis.
ISO 230-7 offers a universal test method, defining error motions and how they should be measured. This ensures results are comparable worldwide.
The ASME B89.3.4 standard provides a comprehensive framework with vocabulary and definitions for testing spindle behavior. It’s a critical resource for accurately specifying and evaluating spindle properties. You can find more information at the American Society of Mechanical Engineers’ Axes of Rotation standard.
Following these standards ensures consistent, comparable results. This allows for confident performance comparisons against specifications, degradation tracking, and benchmarking. Standardization is vital for the quality and efficiency of modern manufacturing.
Spindle Metrology in Action: Practical Applications
Precision spindle metrology is not just theoretical; it’s a practical technology used daily in manufacturing facilities to solve real problems, improve part quality, and increase efficiency.
Every perfectly smooth optical lens, precisely machined aerospace component, or flawless bearing race likely benefited from precision spindle metrology.
Diagnostics is a key application. When a machine produces bad parts or shows symptoms like vibration, metrology acts as a detective tool. Instead of guessing, nanometer-level measurements pinpoint the root cause, whether it’s a worn bearing, thermal growth, or misalignment.
Predictive maintenance uses this power proactively. Regularly monitoring spindle error motions creates a health history, allowing teams to spot trends and schedule repairs before failures occur. This catches problems early, saving time and money.
For industries where precision is critical, spindle metrology is an essential quality control tool. In aerospace components manufacturing, where microns matter, spindle performance is mission-critical. In optics manufacturing, where surface finishes are measured in nanometers, controlling spindle behavior is non-negotiable.
Ultra-precision diamond turning is a demanding application that relies on air bearing spindles with sub-25 nanometer error motions to create mirror-like finishes. Metrology ensures these spindles maintain their incredible precision.
Modern high-speed milling centers running at over 100,000 rpm require an understanding of dynamic behavior to optimize performance and maintain accuracy.
In applications like surface grinding and bearing race manufacturing, metrology provides the insights needed to control error motions for precise flatness and quality.
At MZI Precision, these principles yield real-world results. When rebuilding a spindle, we use advanced metrology to validate that our repairs restore optimal performance. This data-driven approach ensures every spindle we service is ready to produce exceptional parts.
The beauty of precision spindle metrology is its ability to turn manufacturing from a guessing game into a science, providing insights to optimize performance and reduce waste. For more information about how we apply these principles in our spindle services, visit our services page.
Conclusion
Precision spindle metrology is a remarkable field. It’s not just about measurement; it’s about open uping the secrets that live inside every industrial manufacturing spindle.
We have progressed from using dial indicators to measuring spindle movements at the nanometer level. This allows us to spot bearing defects early, predict maintenance needs, and ensure perfect aerospace components.
The beauty of this field is its change of manufacturing from guesswork into science. A precision spindle metrology pdf provides a roadmap to better quality, longer tool life, and less waste. From ultra-precision diamond turning to high-speed milling, metrology provides the confidence to push boundaries.
This technology is only valuable when it leads to real manufacturing improvements. At MZI Precision, we’ve seen how advanced metrology transforms spindle repair and rebuilding from an art into a precise science.
Every spindle we service receives a full metrology treatment. We measure, analyze, and validate every aspect of its performance. When you get your industrial manufacturing spindle back, you receive a unit that performs to specifications you can trust.
Metrology has changed our approach to spindle service. We use data-driven insights to target repairs precisely, which saves time, reduces costs, and delivers superior results.
Our commitment to quality means embracing every advancement in spindle metrology. We use it all to ensure your spindles meet the most demanding manufacturing requirements.
The future of precision manufacturing depends on this level of control. When your industrial manufacturing spindles need expert attention, you want a partner who speaks the language of nanometers and understands what those measurements mean for your bottom line.
Ready to experience the difference that precision metrology makes? Contact us for expert spindle analysis and repair and find how we’re using advanced measurement science to deliver renewed precision and productivity to your operations.


